A well-crafted replica firearm deserves more than a quick snapshot. Whether you’re documenting your personal collection, selling online, or curating a themed display, the way you photograph a replica can make the difference between “nice piece” and “museum-worthy.”
Museum curators and catalog photographers know that outstanding images are equal parts art, science, and respect for history. With a few simple tools and techniques, you can capture your replicas with the same care and precision professionals use for rare antiques.
Here’s how to shoot like a curator; no studio degree required.
1. Prepare Your Replica and Workspace
Before lighting or lenses come into play, preparation is everything. Clean your replica carefully with a microfiber cloth to remove fingerprints and dust. Avoid harsh cleaners, as even small residue can catch light and dull fine details.
Set up your workspace in an area with stable lighting and minimal distractions. A sturdy table or photo surface about waist height works best. Lay out your backgrounds, lighting, and props before you begin so you can move efficiently between angles.
Keep safety in mind throughout the process. Even though Trigger Replicas’ models are non-firing, always treat them respectfully, avoiding public-facing windows or spaces where their appearance could cause concern.
2. Master the Lighting Setup
Lighting is the single biggest factor that separates casual photos from professional results. Museum photographers favor soft, even light that reveals surface details without harsh reflections.
The ideal setup uses:
- Two diffused light sources (softboxes or LED panels) placed at 45-degree angles from the subject
- A neutral reflector or foam board opposite the key light will fill in shadows.
- Dimmable or adjustable lamps so you can fine-tune brightness
If you’re working with limited equipment, a bright window with sheer curtains can create a beautiful diffused glow. Avoid overhead lighting or direct flashes, as these produce glare on metal finishes.
For glossy barrels or nickel plating, experiment with polarizing filters or a circular polarizer on your camera lens. This reduces specular reflections and preserves true color.
3. Choose the Right Backgrounds
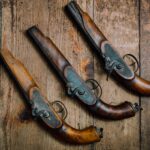
The right background adds depth and authenticity to your photograph. Museums often use simple, texture-rich surfaces that evoke the era of the piece without overpowering it.
Try these collector-approved options:
- Black velvet or felt for dark contrast and a timeless look
- Aged wood boards for Old West or early colonial pieces
- Textured linen or parchment-style paper for 18th- and 19th-century models
- Use neutral gray seamless paper if you want an e-commerce-ready image.
Avoid busy or shiny materials that compete with the replica’s details. When in doubt, simplicity wins.
For consistency across multiple images (for example, if you’re photographing an entire collection), stick to one or two background types and maintain the same distance and lighting ratio in every shot.
4. Capture Macro Details and Engravings
Collectors appreciate the craftsmanship that goes into trigger guards, hammers, and barrel engravings. Use macro mode or a dedicated macro lens to highlight these fine details.
Shoot at a slightly higher f-stop (around f/8–f/11) to keep the entire engraving in focus. Stabilize your camera on a tripod to eliminate shake, and use a timer or remote shutter for precision.
Angle your lighting to the side rather than head-on. This creates soft shadows that enhance depth and reveal texture. For metallic etching or inlaid patterns, move the light slowly until you find the position that best defines the design without glare.
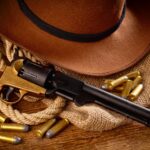
5. Style with Era-Authentic Props
Adding context transforms a simple photo into a miniature historical exhibit. Use props that match the weapon’s time or geographic origin.
For example:
- Flintlocks and dueling pistols: Pair with old maps, quills, or parchment scrolls.
- Civil War or frontier revolvers: Include a leather holster, brass compass, or aged wanted poster.
- European military pieces: Layer a faded flag, medals, or period documents in the background.
Keep the props subtle. They should complement the replica, not distract from it. Think of them as supporting characters that frame your main subject.
When photographing for online listings, use fewer props to maintain a clean, focused composition. Reserve elaborate setups for artistic shots or collection portfolios.
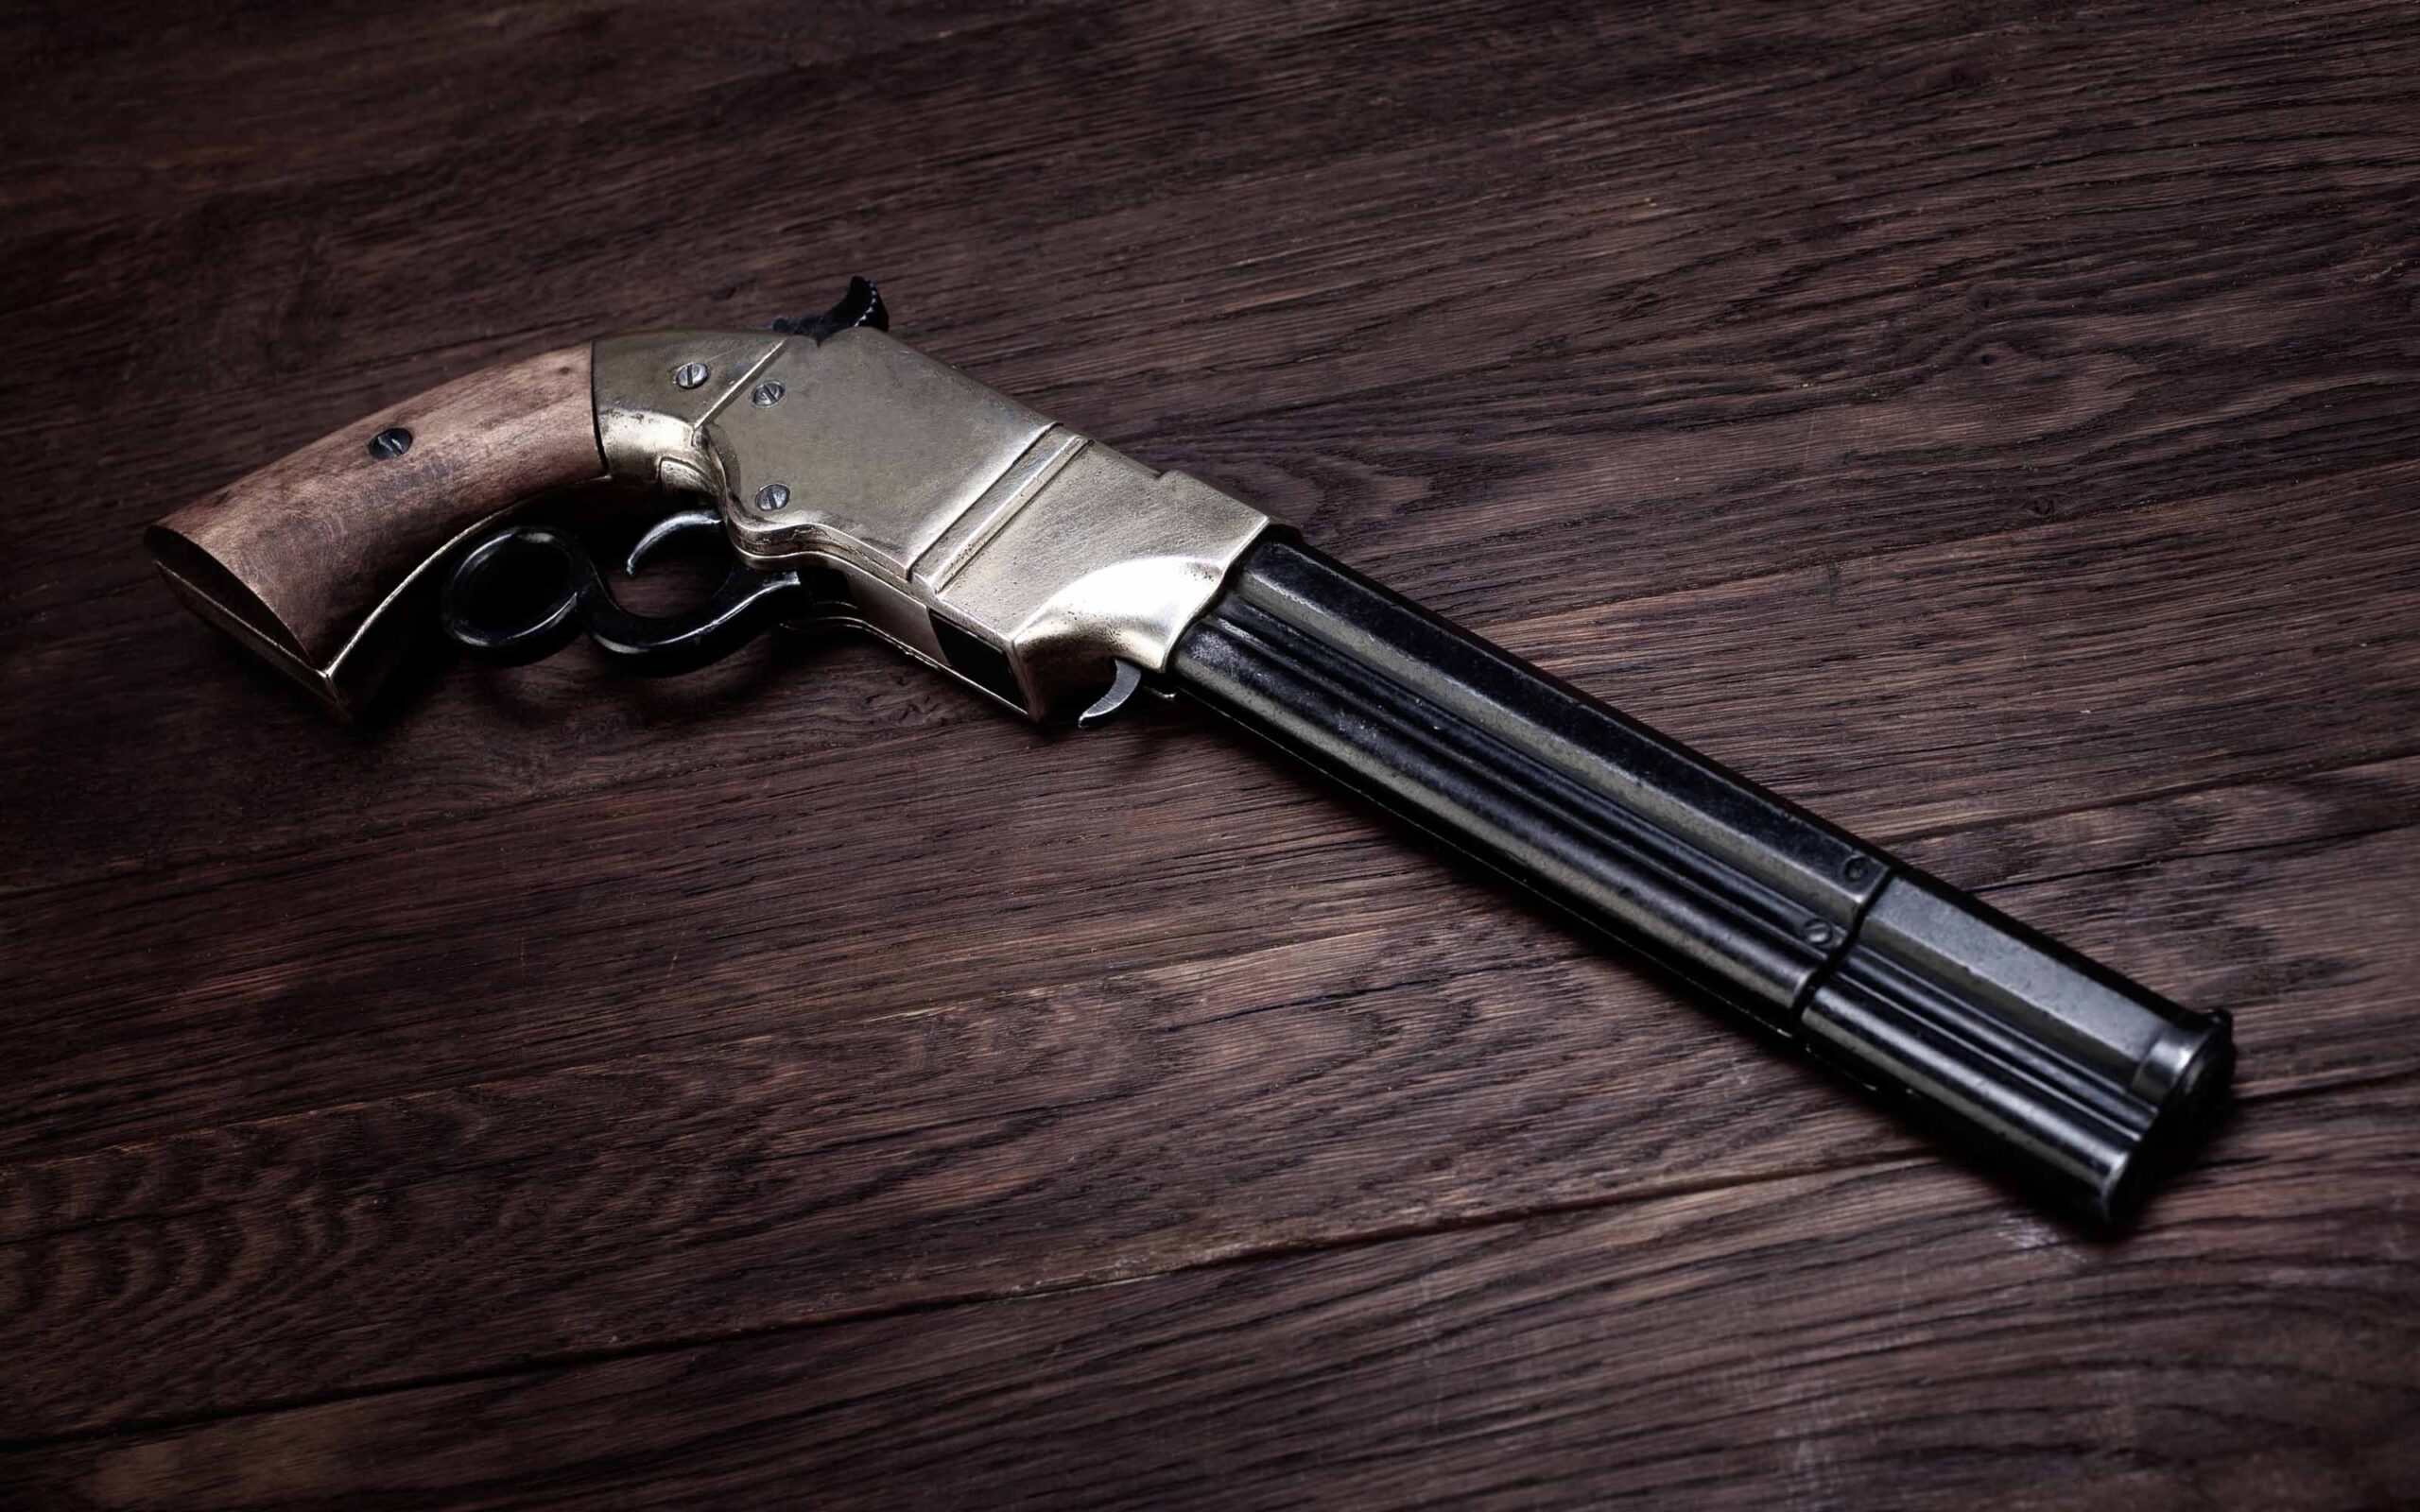
6. Control Reflections and Glare
Metal surfaces are mirrors in disguise. Even with soft lighting, unwanted reflections can sneak into your frame. The trick is to control what your replica “sees.”
Position black foam boards or dark fabric around your setup to absorb excess light. These act like shadow walls, reducing hotspots and helping the firearm’s shape stand out.
If reflections persist, try cross-polarizing: use a polarizing filter on both your light source (if possible) and camera lens, rotated to cancel out glare.
Also, pay attention to your own position. Dark clothing minimizes your reflection in polished parts, and stepping slightly off-center can eliminate visible camera outlines.
7. Compose Like a Museum Catalog
Composition is where art meets documentation. To achieve that museum-level finish, aim for balanced, informative shots.
Start with three key angles:
- Full profile shot (entire piece from side view)
- Three-quarter angle (shows depth and form)
- Detail close-up (engraving, grip texture, or maker’s mark)
Align your subject so major lines run parallel to the frame. Keep plenty of negative space around the replica so it feels intentional, not cramped.
If photographing multiple items from the same era, maintain identical spacing and lighting so the series looks cohesive when displayed online or in print.
8. Edit for Authenticity, Not Perfection
After the shot, light editing can elevate your images while keeping them true to life. Adjust exposure, contrast, and color temperature to match what your eye saw in person. Avoid heavy filters or HDR effects that distort tone or texture. Museum photography prioritizes accuracy over drama. A well-lit, faithfully rendered image communicates quality far better than an overprocessed one.
When posting on your website or social media, include a short caption noting the model name, manufacturer, and historical context. This transforms your photo from a snapshot into a story.
The Art of Showcasing History
Photographing replica firearms is part technical mastery, part storytelling. Every click of the shutter preserves craftsmanship that connects centuries of design and culture. Whether you are a collector, seller, or museum partner, thoughtful photography lets others appreciate that artistry safely and respectfully.
Trigger Replicas encourages collectors to celebrate their pieces through professional-quality presentation. With care, creativity, and the right light, you can showcase history as beautifully as it deserves.
FAQs About Photographing Replica Firearms
Do I need professional equipment to take good photos?
No. A smartphone with manual settings and good lighting can produce excellent results if you control reflections and background.
What kind of lighting is best for metal finishes?
Soft, diffused light from two angles minimizes glare and brings out surface detail. Avoid direct flash or harsh sunlight.
How can I make my replica look historically accurate in photos?
Use era-appropriate props like maps, badges, or leather holsters. Keep styling subtle to maintain authenticity.
What background works best for online product photos?
Neutral gray or black felt is ideal for e-commerce. It isolates the item and reduces visual distractions.
Should I retouch engravings or polish marks in editing?
No. Minor wear or patina adds authenticity. Aim for clean, accurate representation instead of perfection.